Container and Orchestration
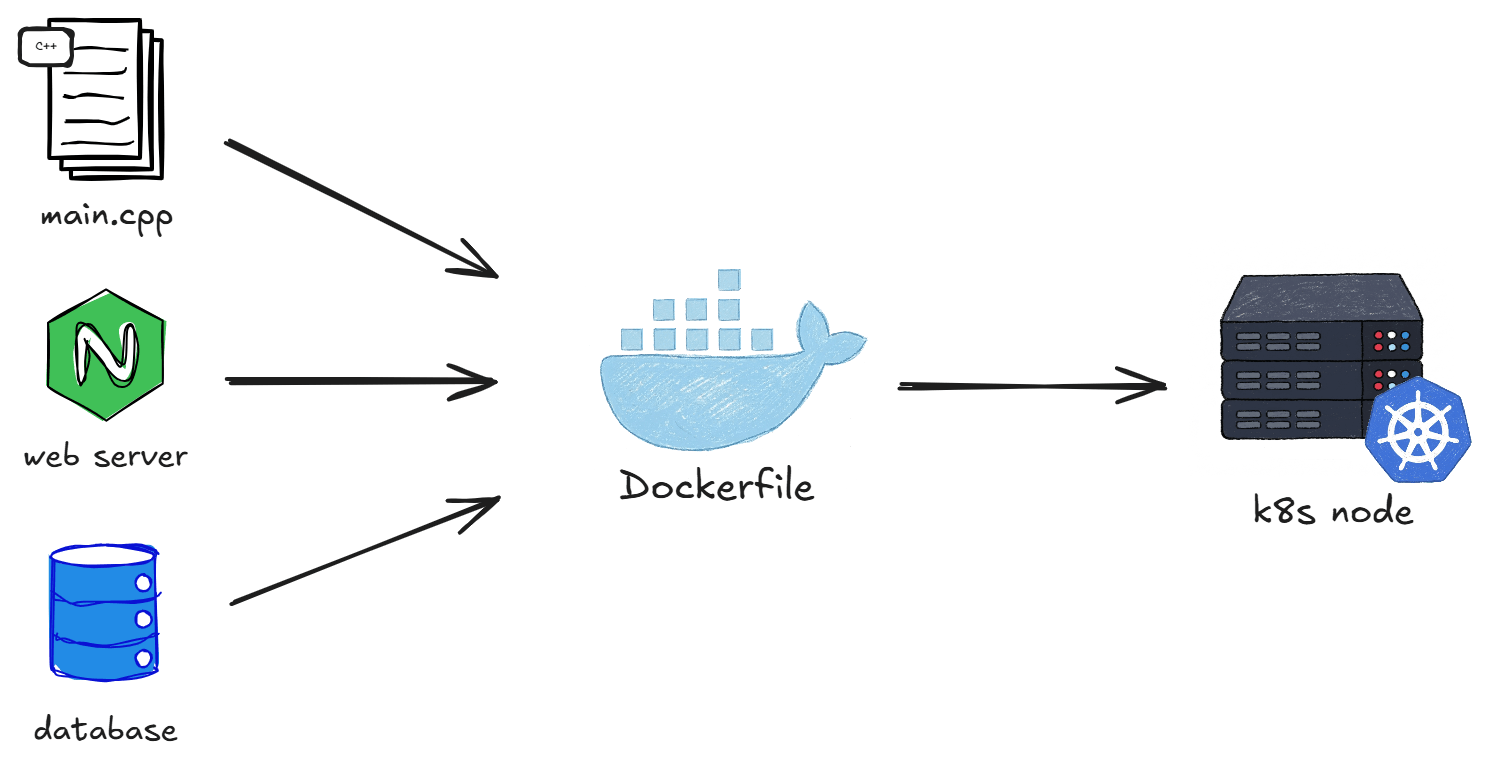
In production ready sometimes involves many challenges one of the most significant is ensuring consistency across local, staging and production environment to avoid from unexpected bugs, deployments failures and higher operational cost.
Containerization helps solve this problem by packaging the app and their dependencies into portable containers that run consistently across different environments. Docker has become the most popular tool for containerization because it simplifies application deployment and improves environment consistency.
As an applications grow, managing containers across multiple servers becomes more complex. This is where container orchestration comes in. Kubernetes (k8s) helps automate the deployment, scaling, and management of containers across a cluster of servers.
In this blog, I will share through a simple setup using Docker and Kubernetes to help you get started with modern containerized infrastructure.
🗃️ Project structure file
here is our project structure file
1
2
3
4
5
6
7
8
9
10
11
12
.
├── config/
│   └── nginx.conf
├── k8s/
│   ├── configmap.yaml
│   ├── database.yaml
│   ├── deployment.yaml
│   └── service.yaml
├── src/
│   └── main.cpp
├── CMakeLists.txt
└── Dockerfile
🐦⬛ Backend code
In this example we use Crow c++ backend framework for this example code in src/main.cpp
1
2
3
4
5
6
7
8
9
10
11
12
13
14
15
16
17
18
19
20
21
22
23
24
25
26
27
28
29
30
31
32
33
34
35
36
37
38
39
40
41
42
43
44
45
46
47
48
49
50
51
52
53
54
55
56
#include <iostream>
#include <cstdlib>

#include <pqxx/pqxx>

#include "crow.h"

std::string get_conn_str() {
  const char *host = std::getenv("DB_HOST");
  const char *user = std::getenv("DB_USER");
  const char *pass = std::getenv("DB_PASSWORD");
  const char *name = std::getenv("DB_NAME");

  return "host=" + std::string(host ? host : "localhost") +
         " user=" + std::string(user ? user : "postgres") +
         " password=" + std::string(pass ? pass : "postgres") +
         " dbname=" + std::string(name ? name : "postgres");
}

int main() {
  crow::SimpleApp app;

  CROW_ROUTE(app, "/")
  ([] {
    return "Hello World!";
  });

  CROW_ROUTE(app, "/users")
  ([] {
    try {
      pqxx::connection conn(get_conn_str());
      pqxx::work tx(conn);

      auto result = tx.exec("SELECT id, name FROM users");

      crow::json::wvalue res;
      res["users"] = crow::json::wvalue::list();

      int i = 0;
      for (const auto &row : result) {
        crow::json::wvalue user;
        user["id"] = row["id"].as<int>();
        user["name"] = row["name"].c_str();

        res["users"][i++] = std::move(user);
      }

      return crow::response(res);

    } catch (const std::exception &e) {
      return crow::response(500, e.what());
    }
  });

  app.port(8080).multithreaded().run();
}
also setup for the build system in CMakeLists.txt
1
2
3
4
5
6
7
8
9
10
11
12
13
14
15
16
17
18
19
20
21
22
23
24
25
26
27
28
cmake_minimum_required(VERSION 3.16)
project(crow_backend)

set(CMAKE_CXX_STANDARD 17)

include(FetchContent)

FetchContent_Declare(
  crow
  GIT_REPOSITORY https://github.com/CrowCpp/Crow.git
  GIT_TAG v1.2.0
)

FetchContent_MakeAvailable(crow)

find_package(PkgConfig REQUIRED)
pkg_check_modules(PQXX REQUIRED libpqxx)

add_executable(app src/main.cpp)

target_include_directories(app PRIVATE
  ${PQXX_INCLUDE_DIRS}
  ${crow_SOURCE_DIR}/include
)

target_link_libraries(app PRIVATE
  ${PQXX_LIBRARIES}
)
🌐 Web server
Setup using nginx / ingress for our reverse proxy and load balancer in config/nginx.conf
1
2
3
4
5
6
7
8
9
server {
  listen 8000;

  location / {
    proxy_pass http://127.0.0.1:8080;
    proxy_set_header Host $host;
    proxy_set_header X-Real-IP $remote_addr;
  }
}
🐳 Container
Package the app using docker container in file Dockerfile
1
2
3
4
5
6
7
8
9
10
11
12
13
14
15
16
17
18
FROM ubuntu:22.04

RUN apt-get update \
 && apt-get install -y --no-install-recommends  \
    g++ cmake git pkg-config make \
    ninja-build build-essential ca-certificates \
    libpqxx-dev libpq-dev libasio-dev \
 && rm -rf /var/lib/apt/lists/*

WORKDIR /app

COPY . .

RUN cmake -S . -B build && cmake --build build

EXPOSE 8080

CMD ["./build/app"]
☸️ Orchestration config
The main components of Kubernetes are Clusters, Nodes, and Pods.
These are the fundamental building blocks of a Kubernetes environment. In this section, we will explore these core components and several other important concepts in Kubernetes.
Configmap
Configmap is a file for store non-confidential in key-value pairs. In this example we use configmap for store nginx web server config in k8s/configmap.yaml
1
2
3
4
5
6
7
8
9
10
11
12
13
14
15
apiVersion: v1
kind: ConfigMap
metadata:
  name: nginx-config
data:
  nginx.conf: |
    server {
      listen 8000;

      location / {
        proxy_pass http://127.0.0.1:8080;
        proxy_set_header Host $host;
        proxy_set_header X-Real-IP $remote_addr;
      }
    }
or you can generate using kubectl in terminal.
1
2
3
4
$ kubectl create configmap nginx-config \
  --from-file=nginx.conf=config/nginx.conf \
  --dry-run=client \
  -o yaml > k8s/configmap.yaml
Service
Because pods can change dynamically, Services are used to provide a stable network endpoint and distribute traffic across multiple Pods through load balancing.
In this example we use services for load balancing in k8s/service.yaml
1
2
3
4
5
6
7
8
9
10
11
12
apiVersion: v1
kind: Service
metadata:
  name: crow-service
spec:
  type: NodePort
  selector:
    app: crow-app
  ports:
    - port: 8000
      targetPort: 8000
      nodePort: 30080
Deployment
Deployment managed pods in k8s to run an application workload. In this example we use it for deploy our nginx and backend using the configuration container in k8s/deployment.yaml
1
2
3
4
5
6
7
8
9
10
11
12
13
14
15
16
17
18
19
20
21
22
23
24
25
26
27
28
29
30
31
32
33
34
35
36
37
38
39
40
41
42
43
44
45
46
47
48
49
50
51
52
53
54
55
56
57
58
59
60
apiVersion: apps/v1
kind: Deployment
metadata:
name: crow-app
spec:
replicas: 1
selector:
matchLabels:
app: crow-app
template:
metadata:
labels:
app: crow-app
spec:
containers:
# 🐦⬛ Crow backend
- name: crow
image: crow-app:latest
imagePullPolicy: IfNotPresent
ports:
- containerPort: 8080
env:
- name: DB_NAME
value: db_crow_app
- name: DB_HOST
value: postgres
- name: DB_USER
value: postgres
- name: DB_PASSWORD
value: postgres
resources:
requests:
cpu: "100m"
memory: "128Mi"
limits:
cpu: "500m"
memory: "512Mi"
# 🌐 NGINX server
- name: nginx
image: nginx:stable
ports:
- containerPort: 8000
volumeMounts:
- name: nginx-config
mountPath: /etc/nginx/conf.d/default.conf
subPath: nginx.conf
resources:
requests:
cpu: "50m"
memory: "64Mi"
limits:
cpu: "200m"
memory: "128Mi"
volumes:
- name: nginx-config
configMap:
name: nginx-config
Setup database
In k8s, data inside containers is not persisted when a server shut down. Persistence Volume Claim (PVC) help request and manage storage on the host or external storage, ensuring the data will not lost.
In this example we merge our config database from PVC, Deployment and Service to setup our postgresql database in k8s/database.yaml
1
2
3
4
5
6
7
8
9
10
11
12
13
14
15
16
17
18
19
20
21
22
23
24
25
26
27
28
29
30
31
32
33
34
35
36
37
38
39
40
41
42
43
44
45
46
47
48
49
50
51
52
53
54
55
56
57
58
59
60
61
62
63
64
65
66
67
68
69
70
71
apiVersion: v1
kind: PersistentVolumeClaim
metadata:
  name: postgres-pvc
spec:
  accessModes:
    - ReadWriteOnce
  resources:
    requests:
      storage: 1Gi
  storageClassName: standard

---
apiVersion: apps/v1
kind: Deployment
metadata:
  name: postgres
spec:
  replicas: 1
  selector:
    matchLabels:
      app: postgres
  template:
    metadata:
      labels:
        app: postgres
    spec:
      containers:
        - name: postgres
          image: postgres:16
          ports:
            - containerPort: 5432
          env:
            - name: POSTGRES_DB
              value: db_crow_app
            - name: POSTGRES_USER
              value: postgres
            - name: POSTGRES_PASSWORD
              value: postgres
            - name: PGDATA
              value: /var/lib/postgresql/data/pgdata

          resources:
            requests:
              cpu: "100m"
              memory: "256Mi"
            limits:
              cpu: "500m"
              memory: "1Gi"

          volumeMounts:
            - name: pgdata
              mountPath: /var/lib/postgresql/data

      volumes:
        - name: pgdata
          persistentVolumeClaim:
            claimName: postgres-pvc

---
apiVersion: v1
kind: Service
metadata:
  name: postgres
spec:
  type: ClusterIP
  selector:
    app: postgres
  ports:
    - port: 5432
      targetPort: 5432
🚀 Build and run
Build project
Before built a project, you need install the docker engine and k8s control plane.
First build container with docker and then load the container and config to k8s.
1
2
3
$ docker build -t crow-app .
$ minikube image load crow-app
$ kubectl apply -f k8s/
Setup SQL data
Next enter to container and add data to the postgresql database.
1
$ kubectl exec -it deployment/postgres -- psql -U postgres -d db_crow_app
1
2
3
4
5
6
7
8
9
10
11
CREATE TABLE users (
  id SERIAL PRIMARY KEY,
  name VARCHAR(255) NOT NULL
);

INSERT INTO users (name) VALUES
('Asep'),
('Dedi'),
('Ujang'),
('Eneng'),
('Lilis');
Testing
Get url external from services NodePort using this to exposes the address.
1
$ minikube service crow-service --url
In this example we get address on http://192.168.59.100:30080 and you can test with curl.
1
2
$ curl http://192.168.59.100:30080
$ curl http://192.168.59.100:30080/users
🎯 Next steps
I’ve only covered a few basics in this blog post. If you want to learn more you can check the offical docs. I recommended you learn more about modern DevOps tools or infrastructure as code and learn this for the next steps: